In this guide, we’ll walk through the entire process of installing WordPress on your web hosting, covering the most common methods: the magical one-click installer, the manual method, and a brief look at FTP.
Before You Begin: What You’ll Need
To get your site online, you need two things:
A Domain Name: Your website’s address (e.g.,
www.yoursite.com). This is your digital street address.Web Hosting: The plot of land where your website’s files and database will live. Most beginners start with a shared hosting provider like Bluehost, SiteGround, or Hostinger.
For this guide, we’ll assume you’ve already purchased both. Once you have, your hosting provider will give you access to a management tool called cPanel. This is your hosting account’s control center, and it’s where the magic happens.
Method 1: The One-Click Wonder (Using cPanel’s Softaculous)
This is by far the easiest and fastest method. Most reputable hosting providers include an app installer called Softaculous in their cPanel.
Step-by-Step Guide:
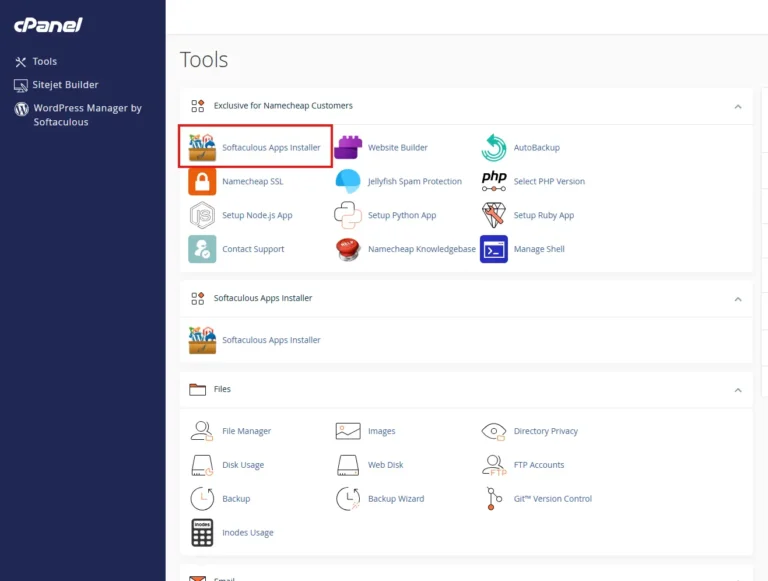
Log into cPanel: Your hosting provider will have sent you a link and login details for cPanel (often something like
yoursite.com/cpanel).Find the Installer: Inside cPanel, look for the “Softaculous Apps Installer,” “WordPress Manager,” or a similar icon. Click on it.
Select WordPress: You’ll see a list of hundreds of apps. Find WordPress and click the “Install” or “Install Now” button.
The Installation Wizard: Now, you’ll fill out a simple form. Here are the key fields:
Choose Protocol: Keep it as
https://if you have an SSL certificate (most hosts provide one for free).Choose Domain: Select your domain from the dropdown menu.
In Directory: Leave this blank if you want your site to be at the root (
yoursite.com). If you typebloghere, WordPress will install atyoursite.com/blog.Site Name: Enter your website’s name.
Site Description: A short tagline for your site.
Admin Username, Password, and Email: This is critical! Choose a strong username (not “admin”) and a very strong password. This is your key to the kingdom. Enter a valid email address.
Click Install: Review your settings, then hit the “Install” button. Softaculous will work its magic in seconds.
You’re Live! You’ll get a success message with links to your new website and your WordPress admin login page (usually
yoursite.com/wp-admin).
✅ Best For: Almost everyone. This is the recommended method for its speed and simplicity.
Method 2: The Manual Method (For Ultimate Control)
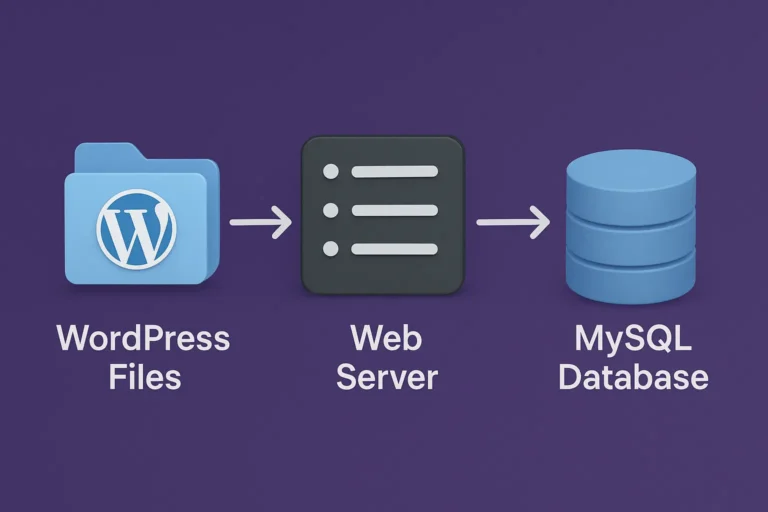
Sometimes you need more control, or your host doesn’t offer a one-click installer. The manual method teaches you exactly how WordPress works with its database.
Step 1: Create a Database and User
WordPress needs a database to store all your content. Let’s build its “brain.”
In cPanel, find the “MySQL® Databases” icon and click it.
Create a Database: Under “Create New Database,” type a name (e.g.,
mywp_db) and click “Create Database.”Create a User: Scroll down to “MySQL Users.” Create a new user with a strong username and password. Click “Create User.”
Link User to Database: Scroll to “Add User to Database.” Select the user and database you just created and click “Add.”
Assign Privileges: Check the box for “ALL PRIVILEGES” and click “Make Changes.” The database is now ready!
Step 2: Download and Upload WordPress
Go to wordpress.org/download/ and download the latest
.zipfile.Back in cPanel, find the File Manager. Open it and navigate to your
public_htmldirectory (this is your website’s root folder).Upload the ZIP file: Click the “Upload” button and select the WordPress.zip file you downloaded.
Extract the Files: Once uploaded, find the file in File Manager, right-click it, and choose “Extract.” This will create a
wordpressfolder.Move the Files: Open the
wordpressfolder, select ALL files and folders, and move them intopublic_html.
Step 3: The Famous 5-Minute Install
Now, go to your domain (
www.yoursite.com) in a new browser tab.You’ll see the WordPress installation screen. Select your language.
You’ll now be asked for your database credentials:
Database Name: The name you created (e.g.,
mywp_db)Username: The database user you created
Password: The password for that user
Database Host: Usually
localhost(your hosting provider will confirm this if it doesn’t work).Table Prefix: You can change
wp_to something likewp23_for a slight security improvement.
Click “Submit” and then “Run the installation.”
Finalize your site title, admin username, and password. You’re done!
A Quick Note on FTP (File Transfer Protocol)
FTP is an alternative to File Manager for uploading files. You use an FTP client like FileZilla to connect to your server.
When is it useful? For uploading large files, moving a locally developed site manually, or when you can’t access File Manager.
How it works: You use the FTP credentials from your cPanel (host, username, password) to connect via an FTP client. You then drag and drop the WordPress files from your computer into the
public_htmlfolder on your server. The installation steps after the file upload are identical to the manual method.
Your Website is Now Live!
You’ve successfully moved from a local development environment to a live website on the internet. Whether you used the one-click magic of Softaculous or the detailed manual method, you’ve accomplished a key milestone.